Thursday, December 24, 2015

Merry Christmas!

I want to wish all of you a very Merry Christmas! I hope you have a wonderful day full of love and laughter!

"Yellow Poinsettia" by Eileen Wintemute
Thank you for visiting my blog!

Monday, December 21, 2015

A Few Construction Tid Bits for the Slouchy Christmas Purse

I wanted to give you a couple details on the making of this purse.


I stitched the jewelry by hand using a strong thread.


The handles were purchased from a vendor at the Houston Quilt Festival. I hand stitched them to the purse front.


Joanne's big stores carry purse making supplies. I found these metal feet there, as well as magnetic closures. I went to You Tube and watched a couple videos that showed me how to add them to the purse.


It was a fun project to make. Thanks for visiting my blog!


Wednesday, December 16, 2015

Slouchy Holiday Purse!

This is a perfect time to show you my Holiday Purse! I call it a Slouchy Holiday Purse because it tilts to one side. I made this using a pattern I purchased at Road to California about 4 years ago. I started it at a retreat and just finished it. 


I used some of my Mother's costume jewelry on the front of the purse, and the red lower section is made from a red velvet dress that she made for herself.


So now I have a Christmas special occasion purse!

Thanks for visiting my blog!

Thursday, December 3, 2015

Coloring Books for Adults!

You've probably heard about this latest trend, but in case you haven't, they now sell coloring books for adults. What a great way to fill time while watching TV! I got this one today in the mail from my brother and sister-in-law. 

I'll be using it soon. Thanks for visiting my blog!

Wednesday, December 2, 2015

Yosemite Inspiration

I went to Yosemite for Thanksgiving this year. What a beautiful and inspiring trip! 

Here are some photos I wanted to share:

A leaf that would look great as an art quilt...


A frosty bush...


A very well fed deer. Look at that belly!


Thanks for visiting my blog!

I hope you are having a nice Holiday Season

Hello out there in the blog-o-sphere!  I wanted you to know I'm having trouble with my blog posting. Basically I can't upload photos to a post. I'm trying to figure this out and will post as soon as the problem is fixed. I hope you are having a nice day!

Saturday, November 7, 2015

Thread Painting


In this post I'm going to describe the thread painting technique that I used in the Pam Holland workshop.  The rooster in the art quilt above has been thread painted using this method. 

As previously described, we started with white fabric with a line drawing of our image on the fabric. The white fabric was spritzed with water and then ink was dropped on the damp fabric. The color of ink we dropped matched the color on the image you wanted to create. The inks bled into each other and that was fine. The goal was to create a guide for stitching so you knew what color to stitch where. 

ink painted fabric rooster and pin basted top

After the inks dried the fabric was pressed and fusible was ironed on the back. The image was cut out and fused to your pieced background. The top was then sandwiched with batting and the fabric back that you selected and pin basted. That is the first step in the thread painting process. The next step is the stitching.

The stitching is done using a domestic sewing machine. A zigzag stitch is the primary stitch used. Once in a while you use a straight stitch but most of the stitching is done with a zigzag stitch. I used a darning foot on the machine with my feed dogs down. I started the stitching by selecting one color of thread and zigzag stitching in that area. Then I changed thread color and moved to the adjacent area.

In each area I tried to thoroughly stitch to cover as much of the background fabric as possible.  I overlapped the stitching into adjacent areas for blending. Sometimes I used more than one shade of a color in an area to add depth. 

Here are some detail shots that show the stitching:


I continued on in this manner until the entire rooster was covered. I was very happy with the way it looked when it was done.  I thought it gave a more three dimensional appearance to the subject. 
I intend to use this process again on another quilt.  It is ideal for texture I think!       

Thanks for visiting my blog!


Friday, October 30, 2015

Shadows and Outlines


In my last post I talked about getting ready for thread painting. I'm going to give a couple more bits of information about this in this post.

First - did you notice the dark blue shadows under the rooster? How about the dark blue outlining around parts of the rooster?

The outlining is a technique that Pam used on her Wolf and she wanted us to use it on our images. I think it was absolutely necessary here in the areas where the rooster colors were close in value to the background fabrics. It made those areas stand out where they otherwise would have disappeared. The blue fabric had fusible on the back of it and it was cut in thin sections in the shape of the rooster outline. It was slipped behind the cotton inked fabric before the rooster was fused to the background.

The shadow pieces were added by me to "ground" the rooster. I didn't want it just floating in space. After the shadows and outlines were added, the top, batting, and backing fabric were sandwiched and pin basted.

I think the outlining technique is a good one and well worth remembering for other fiber art pieces.

Thanks for visiting my blog!

Friday, October 23, 2015

Rooster Background

Completed Rooster

The background for the Rooster was made using Cherry Wood fabrics. If you aren't familiar with them, they are made of cotton but have a suede like appearance. They aren't sold locally. I have to buy them at Road to California, or order them on-line.  I took the lead from on the background design from Pam's Wolf piece.

After the background was pieced it was time to get ready to thread paint. The first step is to take a piece of white cotton fabric, trace your design on it and then paint it with Tsukeniko inks. The white background fabric is spritzed with water so that the inks spread out in a watercolor fashion. The idea is just to put the colors you want to thread paint in the places on the design. The colors act as a guide for stitching, and help to fill in an area that isn't completely covered with thread.

After the ink dries you put fusible on the back of the painted fabric, cut out the image and fuse it to your background fabric. You can see this step below:

painted image

 Thanks for visiting my blog!

Friday, October 16, 2015

Rooster - Thread Painting

Thread Painted Rooster


Before heading to Asilomar I prepared my drawing and color plan for the Rooster I was hoping I would be able to make in class. Pam sent out an email indicating that we could make something other than the wolf a few weeks before the class, so I had time to prepare for this.

I had some photos of roosters that I had taken at a Farmer's Market in Arroyo Grande. These are some of the photos:


The middle photo is the one I used for the drawing of the Rooster I wanted to make. I added a bit to the tail and comb, but its mostly from that rooster. Here is my rooster drawing:

drawing


The next step is selecting colors. Pam suggested we use Cherry Wood fabrics. I purchased a packet of those at Road to California, so that was my basis for the colors of the Rooster and background. Below is a photo of my color plan for the rooster that I brought to class:

color plan


So that was my start. I'll show more of the making of this in my next posts. Thanks for visiting my blog!


Friday, October 9, 2015

Thread Painting

This year I had the opportunity to take a class at Asilomar, and I chose a thread painting class with Pam Holland. This is the Wolf that Pam Holland was suggesting that students make in the class:

Pam Holland's Wolf


We had the option to do something of our own, and it seemed that most people in the class opted for another subject to make. I have wanted to make a rooster for a long time, and I thought the thread painting stitches would lend themselves to feathers, so that is what I chose. Here is my finished Rooster that I started in that class and finished later on my own:

Free Range Rooster by Eileen Wintemute

I loved the class, partly for the techniques that I learned, and partly because I found Pam Holland so enjoyable to spend time with. I can see why she has the number of followers that she has! In fact, I am going to the Houston Quilt Festival in a few weeks and have signed up for another class with her while there.

I'm going to show you how I made this in the next few posts. I hope you enjoy learning about Pam's process.

Thanks for visiting my blog!

Wednesday, September 30, 2015

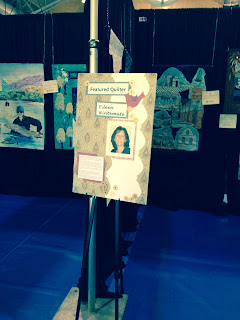
Featured Quilter At Flying Geese Quilters Guild 2015 Quilt Show

What a great experience it was to be one of the Featured Quilters at the 2015 Flying Geese Quilters Guild Quilt Show! I had a chance to speak to a lot of people and it was extremely flattering to have my work on display. I received many nice comments and had a chance to show some family and friends my fiber art work. Fiber Art is a major part of my life, but I have other interests and friends and some have not seen my work. I think some of them think I make traditional quilts and don't quite understand what I mean when I describe it. So having a chance to show them what I make was important to me. This last weekend will be one of the highlights of my life, I think.

 Here are some photos of my area at the show:

Pelican on Pier

Some of my fiber art pieces on display

Some of my fiber art pieces on display

Some of my fiber art pieces on display

My Poster Board

Some of my fiber art pieces on display

My Brother John and Me

My Cottage Friends Group


Some of my fiber art pieces on displayon

Some of my fiber art pieces on display


Wednesday, September 9, 2015

Come See Me at the Flying Geese Quilt Show

I'm honored to have been asked to be one of two featured quilters at the Flying Geese Quilters Guild Quilt Show on September 26 and 27. The Show will be at Soka University. The other featured quilter is Denise Nelms. I will have about 25 of my art quilts on display. Denise creates beautiful traditional quilts and many of hers will also be on display. 

The show is going to have 30 vendors, an auction, a boutique and a lot of beautiful quilts to look at. I hope you can make it to the show. I'd love to see you there!


Sunday, September 6, 2015

Tips for Using Exotic Fabrics


As I said in my last post, using "non-cotton" fabric can add a lot of interest to an art quilt. I have learned a few tricks for using these fabrics and I'm going to pass on a few here:


  • Organza fraying - the best way to stop the fraying is to "melt" the edge of the organza just a tiny bit. I light a votive candle and hold the fabric about 1/4" from it for just a moment. The edge is sealed by that heat, but is not burned. You need to practice this to figure out how close to hold it and for how long.

  • Flimsy fabric that is not sheer - I back this fabric with either a fusible or fusible interfacing. If I use interfacing I make it light weight. It adds just enough body without making it stiff.

  • Fraying on fabric other than a sheer - You can finish the edge in some way to address this. If that is not what you want to do, then I recommend a combination of fusing the back and using Fray Block. I also don't stitch too close to the edge of the fabric if it is not tightly woven.


    Those three techniques go a long way with more exotic fabrics. I hope you give them a try.

    Thanks for visiting my blog!

Sunday, August 30, 2015

From Cottons to Silks


Cotton fabric is wonderful on art quilts, especially when you are painting the fabric yourself. I use it for most backgrounds and painted pieces. It gives a smooth appearance that is clean looking. But.....

I love using more exotic fabrics on my art quilts. 

I know they have issues with fraying, or being flimsy, or too transparent, or too stiff, or whatever, but they add texture, visual interest, dimension, transparency and sheen to a piece. On this pelican piece I have used velvet, wool, raw silk, Japanese textiles, organza, metallic fabric, silk sari fabric, and the good old stand-by, cotton. I really love the variety of textures it gives to the piece.  I also love being able to shop for fabrics beyond the cotton sections. 


Velvet, wool, raw silk, Japanese textiles, cotton

Organza, metallics, raw silk, Japanese textiles

Sari fabric

Monday, August 24, 2015

Pelican on Pier - Design and Pattern

I thought I'd use this post to show how I made the pattern for this art quilt once I had the design drawn. As mentioned in my previous post, the pelican was based on a photo of a juvenile pelican that I saw on Balboa Pier.


This is the photo that I took of the juvenile pelican. I copied the photo in black and white and enlarged it on copy paper. Black and white allows you to see the major shapes more easily. I  wanted to come up with a line drawing of the pelican, and using an enlarged photo makes that easier.


The drawing below shows the pelican line drawing. I added a little "heft" to the size of the pelican because I wanted it to look like a robust healthy bird, and I thought the juvenile (above) still looked a little lean. I focused on the primary lines that define the shapes of the bird parts. The only area that required more detail was the wing. I have made bird art quilts before and the ones I made with lots of individual feathers looks much better to me. It's a little tedious, but worth it in the end.


After you get the line drawing made, you enlarge the drawing to your finished size. I do this at my local FedEx Office store. I'm on good terms with the large format printer and need no help to get my enlargements done.

Pattern pieces are easily made by taking your enlarged drawing, laying freezer paper over it and drawing around the lines. Then cut out the pieces. Be sure to label your enlarged drawing shapes and your corresponding freezer paper pieces.Here are some of my wing and tail feather pieces.


Here are my larger wing and tail background shapes.


My design also includes palm trees in the background. I considered putting in beach apartments but they looked too busy in my initial sketches. I had palm tree pattern pieces from a previous art quilt and was able to reuse those. Here are my reused palms patterns.


So its fairly simple: take a photo, trace a line drawing, draw the shapes on freezer paper and cut them out.

Thanks for visiting my blog!

Friday, August 7, 2015

Pelican on Pier - Where the Idea Came From....


This is my "Pelican on Pier" fiber art piece that I made for the Beyond the Edge Boundless Exhibit. It is 18" wide by 36" high and mounted on a stretched canvas.  The tail and part of the head/beak extend beyond the canvas. I love the presentation on the canvas.

Pelicans are such interesting creatures to look at, they remind me of pterodactyl dinosaurs. Making a pelican art piece has been on my artwork bucket list for a while, so I'm glad to get this item checked off!

The inspiration for this piece came from a young pelican on the Balboa pier.


My husband and I were taking a walk before getting lunch at a local restaurant and this guy was just sitting on the pier, scanning the water for his lunch. He kept one eye on the water and one eye on the people on the pier.  I was surprised at how seemingly comfortable he was with people nearby, and all the photos I could snap of him without him flying away. So his shape and details became my drawing.

The colors I used were very different from this young pelican's coloration. I found his coloring a bit drab and not in my favorite color scheme. I had some other photos of pelicans and I liked the shading in some of the adult pelicans, so I used that as a starting point. I don't really try to mimic "real life" coloring for the most part. I prefer making things interesting in colors I like.


This is a pretty rough sketch, but here is the color plan that I started with for this piece.


Next steps are cutting patterns pieces for it. That will be my next post. Thanks for visiting my blog!