
Sunday, December 25, 2011
Merry Christmas
Thursday, December 15, 2011
Yarn Shopping

Saturday, December 10, 2011
Lutrador Clouds

I don't know about you, but I think this justifies buying more stuff that I have no idea what to do with!
Thursday, December 1, 2011
City Scape Water
For the water on the city scape, I place a dark organza over a light blue fabric that had a water like appearance. I needed the dark organza because the light fabric didn't look like an evening scene of water.

Next I used various pieces of tulle on the organza to depict reflections of buildings.


Next I used various pieces of tulle on the organza to depict reflections of buildings.

Tuesday, November 29, 2011
It was a cold and stormy night...

I used a lot of laces, ribbons and other trims to depict the look of windows in sky scrapers. I had a lot of fun doing this piece and plan to do more "cityscapes".
Thursday, November 24, 2011
Happy Thanksgiving!
I hope you have a wonderful Thanksgiving, wherever you are! Here are a couple of shots of a Thanksgiving pillow I made a couple of years ago. I used a lot of beading on this one!


Friday, November 18, 2011
Winter City Scape
I am always working on more than one project at a time, either because of deadlines coming up, or because sometimes I like to do machine quilting, and other times I want to do some other stage of a project. In addition to the Tall Stems wall hanging, I am also working on a winter city scape for an exhibit.
 Here is a view of the sky and buildings early in the process. I want it to look like a winter scene, so I used a fabric that has slanting silver lines, similar to rain falling.
The buildings are made from a variety of fabrics with prints that give an idea of windows or building facades.
This project is due at the beginning of December, so I better focus on it for a while!

The buildings are made from a variety of fabrics with prints that give an idea of windows or building facades.
This project is due at the beginning of December, so I better focus on it for a while!
Tuesday, November 8, 2011
Nobel Seasons - Fall

Monday, October 31, 2011
Flowers in Tall Stems 2

Wednesday, October 26, 2011
A Larger Version of "Tall Stems"
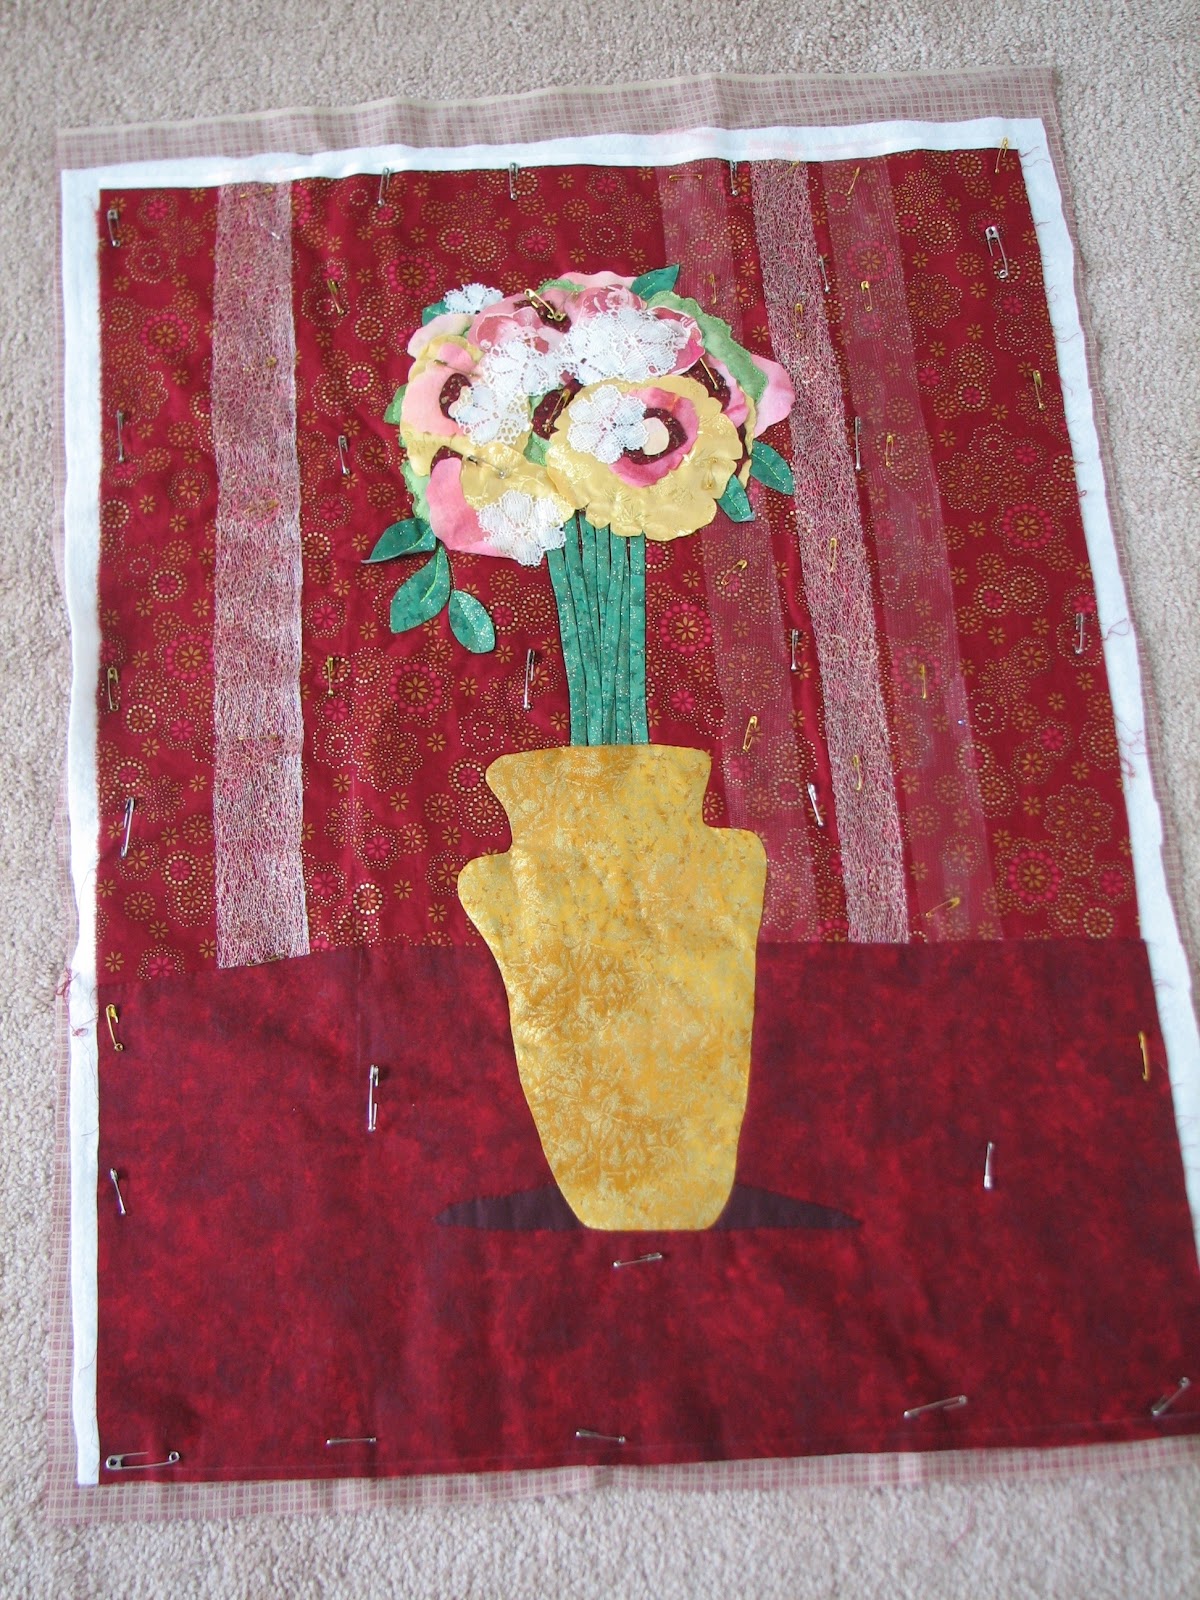 |
| Tall Stems 2 |

Sunday, October 16, 2011
Recent Sketches

Thursday, October 13, 2011
Sketches

Friday, October 7, 2011
It's Done!


Sunday, October 2, 2011
Details
This is a detail of my "Gated Community" art quilt, made for the "Gates" challenge for Quilt on the Wall. I went with the idea of a private community of flamingos secure behind a fence and gate. I made the fence out of a net fabric that I dyed with a little blue fabric ink. I put a beaded trim around the fence to border it. I then put a frog closure on the gate as the closure.
This is a close up of the signage sticking out of the plant growth in front of the fence. The signs say "private" and "flamingos only".
 |
| the gate |
 |
| Signage |
Tuesday, September 27, 2011
Gated Community Edging


Monday, September 26, 2011
Flying Geese Quilt Guild Quilt Show
The Flying Geese Quilters Guild will be putting on a quilt show this weekend at the Soka University in Aliso Viejo. The quilt show runs on Saturday and Sunday from about 10 am to 4 pm-ish each day. This guild, which I am a proud member of, consistently puts on one of the best shows in Southern California. I have seen many of the quilts in the show and they are stunning. If you have a chance, this would be a good show to check out!
Saturday, September 24, 2011
Boo Boo Pins

Tuesday, September 20, 2011
Gates - Just a Start

Here is the start of the quilt. I took a photo of my painting and sent it off to Spoonflower to have it printed on fabric. Then I placed the Spoonflower fabric on the blue fabric. It's just a start at this point.
Thursday, September 15, 2011
Cool Blue Vase Series No. 2 Close Up


Wednesday, September 14, 2011
Cool Blue Vase No. 2

I quilted a picture on the wall in the background, along with a swirling pattern on the wall.
Saturday, September 10, 2011
Cool Blue Vase Series No. 2

Wednesday, September 7, 2011
Geometric Landscape

Saturday, September 3, 2011
Cool Blue Vase with Quilting

Friday, September 2, 2011
 |
| Add caption |
At this stage I have fused the major shapes to the background fabric. The next step is to do the stitching down of the applique pieces, and then machine quilt the background.
Have a great day!
Monday, August 29, 2011
This is a photograph of my Bridges Exhibit entry, "Approaching Mott Bridge", at the IQF Long Beach Show. We were not allowed to publish photos of these before the show. But, since it has now been weeks since the show is over, I think I am safe!
The theme of the exhibits was Bridges, so I created a fiber art piece based on my experiences on the North Umpqua River in Oregon. This river has a famous bridge - Mott Bridge, and is known for legendary steelhead fishing. I have included a steelhead jumping a waterfall and a depiction of Mott Bridge in the background.
This quilt is now traveling with the Bridges Exhibit. I believe it will be at the Pennsylvania National Quilt Show in September.
 |
| Approaching Mott Bridge |
The theme of the exhibits was Bridges, so I created a fiber art piece based on my experiences on the North Umpqua River in Oregon. This river has a famous bridge - Mott Bridge, and is known for legendary steelhead fishing. I have included a steelhead jumping a waterfall and a depiction of Mott Bridge in the background.
This quilt is now traveling with the Bridges Exhibit. I believe it will be at the Pennsylvania National Quilt Show in September.
Thursday, August 18, 2011
Batik Vase Embellishing


...and here is the inspector, asleep on the job again! What are you going to do!
Saturday, August 13, 2011
Batik Vases - some progress


Wednesday, August 3, 2011
Thread Lock

This is what I have found works for me:
I go back and forth with a short stitch once or twice. Then, on the back I put just a touch of thread knot glue at the start or stop. I use a small, inexpensive paint brush to dap the knot glue on the threads. I have found this to work very well.

Saturday, July 30, 2011
Batik Vase with oil paint stick flowers

But that will have to wait, because I am off to the IQF Long Beach show today! Hope to see you there!
Tuesday, July 26, 2011
Batik Vase


I have couched yarn to make the flowers and stems. The flowers look a little ghostly at this stage. I am going to fill them in with oil paint stick and see if that helps. Then quilting.
I will post photos from the next stages soon.
Sunday, July 24, 2011
A Budding Artist
This is the Yearbook Cover for an Elementary School in the Central Coast. Why would I show it here? Because it was created by my nephew, Shane Tryon! Shane is only 8 years old and won the yearbook cover contest for the entire school. I am obviously very proud.
I think he did a great job with this artwork. In particular, I love the multi-colored dots placed around the school logo. Great job Shane!
I think he did a great job with this artwork. In particular, I love the multi-colored dots placed around the school logo. Great job Shane!
 |
Monday, July 18, 2011
Desert Sunset 1 got a ribbon at the Fair

I don't know what the ribbon is for yet so I will have to check it out Thursday when I am there. This Thursday I will be working at the Flying Geese Quilters Guild booth from 4:30 - 7:00. Stop by if you happen to be there at the same time.
And thanks to my Sister-in-law Melodye for letting me know about the ribbon!
Wednesday, July 13, 2011
Bridges Exhibit at the Long Beach IQF

This year I have a quilt in one of the exhibits called "Bridges". This is a Quilts on the Wall Exhibit, and the image at the left is the postcard for it created by Jo Griffith. The postcard is a compilation of parts of each of the fiber art pieces in the exhibit. I am prevented by IQF from showing my quilt here until after it shows in Long Beach. If you make it to the show I hope you check out this exhibit, and have lots of fun too! And congrats to my friends who have quilts in this show.
Wednesday, July 6, 2011

Anyway, after rolling the quilt up, I tie it keep the roll together, and then slide it into a bag I made to keep the dust off. The photograph below shows the quilt in the bag. I make the bags from light-weight, "slidey" fabric so it goes easily over the cotton fabric of the quilt.
Then I prop the whole thing up in the back of a closet. I think it works pretty well. I actually first learned to roll my quilts face out during a class from Hollis Chatelain. I guess if it's good enough for her, it's good enough for me!

Saturday, July 2, 2011
Storing a Quilt

Bird Of Paradise is Done

Sunday, June 26, 2011
Hibiscus - Postcard Quilt
This is my postcard quilt for my Serendipity Exchange. The theme this time is "Flower". I painted a hibiscus from a photo I took while on a cruise in the South Pacific a few years ago. I used Tsukineko ink paints. I practiced some new leaf machine quilting patterns I recently learned from Cynthia Catlin in the background. For the border I couched some yarn around the edge. This is being sent to Linda Friedman as we speak. I hope she likes it.
 |
| Hisbiscus |
Sunday, June 19, 2011
Umpqua Leaves Construction Detail
I thought it might be helpful to see how this applique technique works. After cutting out the leaf shapes and placing them on your square, you place a layer of batting behind the square and stitch the leaves down. You stitch on the leaf itself near its edge and then in the middle of the leaf. The leaves are raw edge and the batting piece is approximately the same size as the square.
Then you turn the block over and trim the batting away around the leaf. You try to trim as close to the stitching as possible. Once all your blocks are done you stitch them together to make the top.
The top is then layered with batting and the back, and quilted in the background around the leaves. This effect "pops" the leaves out.
I learned this in a class taught by Jill Howes at Flying Geese Fabric. I have used it to make other applique motifs pop out on other quilts.
 |
| trapunto effect |
 |
| trapunto effect |
The top is then layered with batting and the back, and quilted in the background around the leaves. This effect "pops" the leaves out.
I learned this in a class taught by Jill Howes at Flying Geese Fabric. I have used it to make other applique motifs pop out on other quilts.
Subscribe to:
Posts (Atom)