My last foreground additions are sailboats in the water. I
made three different sailboat shapes on freezer paper and used these as
patterns to cut the fabrics out. Once again I fused two pieces of fabric
together wrong side to wrong side and cut out the boat bottom and sail shapes. Rick Rack was my mast. I experimented with placement
of the boats and once I was satisfied, stitched the pieces down.
Tuesday, July 16, 2013
Friday, July 12, 2013
Palms, Surfboards, Waterline
I am nearly finished with my "Slice of the OC"
piece. On this post I show some of the foreground work. The raw edge between the sand and water fabric needed "something" because it looked a little too unfinished with just a straight
stitch. I placed a thin piece of rick rack along this edge to finish the water
line.
Above and below you see photos of both the palms and surfboards
stitched down with zig zag or straight stitches. They fill up the foreground
and cover some of the bland look at the front of the buildings. I also added some little pieces of lime green rick rack to finish it off.
Serendipity Show at Soft Expressions
The Serendipity art quilt exchange group I belong to is having a show at Soft Expressions upstairs gallery. Our postcard and 12" x 12" size pieces will be on display for the next month or so. We have a "Meet the Artists" event tomorrow. The information for the show is below. Several of us "Serendipities" will be there tomorrow. I hope to see you too!
Tuesday, July 9, 2013
A Slice of the OC - Saddleback Mountain
No
| Skyline |
The first step is to draw in the mountain range line on the
sky fabric. I drew it in and then stitched on that line. Next I laid the
double layer of tulle over the area that I wanted the mountains to be. It was pinned in place to prevent it from
moving, which tulle likes to do. Then I stitched around the building tops at
the sky line, and then stitched on the mountain line. Lastly I trimmed the
excess tulle above and below the stitching lines. And there it is, instant
mountain range! I love the color of the sky fabric that you can see through the tulle. It gives it a variable appearance like you would expect from mountains.
| Mountain |
Wednesday, July 3, 2013
Stitching Down the Buildings
The continuing saga of "A Slice of the OC"... When last we met, our project had a background, many buildings, shading and trims. But they were all just laying there, ready to fly away with the wind. Well, we better get them stitched down before that happens.
I like to use my stitching down of the buildings as my quilting stitching as often as I can. It saves so much time! To prevent my buildings from shifting in location, I used pins, small bits of fusible and fabric glue to keep the buildings in their proper place during this process. I created my sandwich of my top, batting and backing, and then pinned the three layers in place. Once I had my sandwich I went to the machine.
I used a straight stitch on most of the buildings and just stitched about 1/16" from the edge of the fabric around the buildings. This is raw edge applique, so I didn't want to get closer than that to minimize fraying. On the yellow buildings I couched blue yarn around the edge using a zig zag stitch. For the Ferris wheel I stitched rick rack around the perimeter and used that stitching to secure the wheel. I also stitched the building edge lines using a straight stitch.
And here are the stitched down buildings!
Thursday, June 27, 2013
Shading the Buildings and Laces - Slice of the OC
First a personal note: Many of us are at the age where our
parents are aging and need more help from us. I am in that boat and thankful to
still have them with me and be able to help. My posts may be a little less
frequent for the next few months because I am juggling a lot right now, but I
promise to do my best and keep posting as often as I can. I value my blog
visitors and followers and understand the importance of giving you something
new to read and see. So thank you in advance for visiting my blog and your
understanding if I seem AWOL at times!
Now onto the art quilting stuff!
The first photo shows the buildings with shading and
the lace trims colored by the oil pastels. You can see that the addition of the
shading increases the three dimensional appearance of the buildings. Also, the
laces were originally an ivory color. I wanted their color to match the palette
that I had selected for this quilt. The photo below shows the oil pastel I chose to color these buildings.
To apply the shading I lay the cut out building or lace on a
piece of paper. I used drawing paper because I think it will blot the excess
oil pastel when ironed. I gently stroke
the fabric with the pastel crayon in the same direction and build up color.
Once I get to the intensity I want I fold the paper over the
"painted" side of the lace or fabric building, and then iron it for
about 15 seconds several times. You can see some color on the paper from this
setting technique. If the color is not as strong as I want, then I repeat the
process. Sometimes it takes about 3 days for the colored pieces to completely
"dry", so I tend to be a little careful during that time not to smear
color on another fabric. That hasn't
happened, but I am still a little careful.
That's it. Its simple, fast and cheap. A great combination for many things, but I can think of some exceptions!
Saturday, June 8, 2013
A Slice of the OC - trims
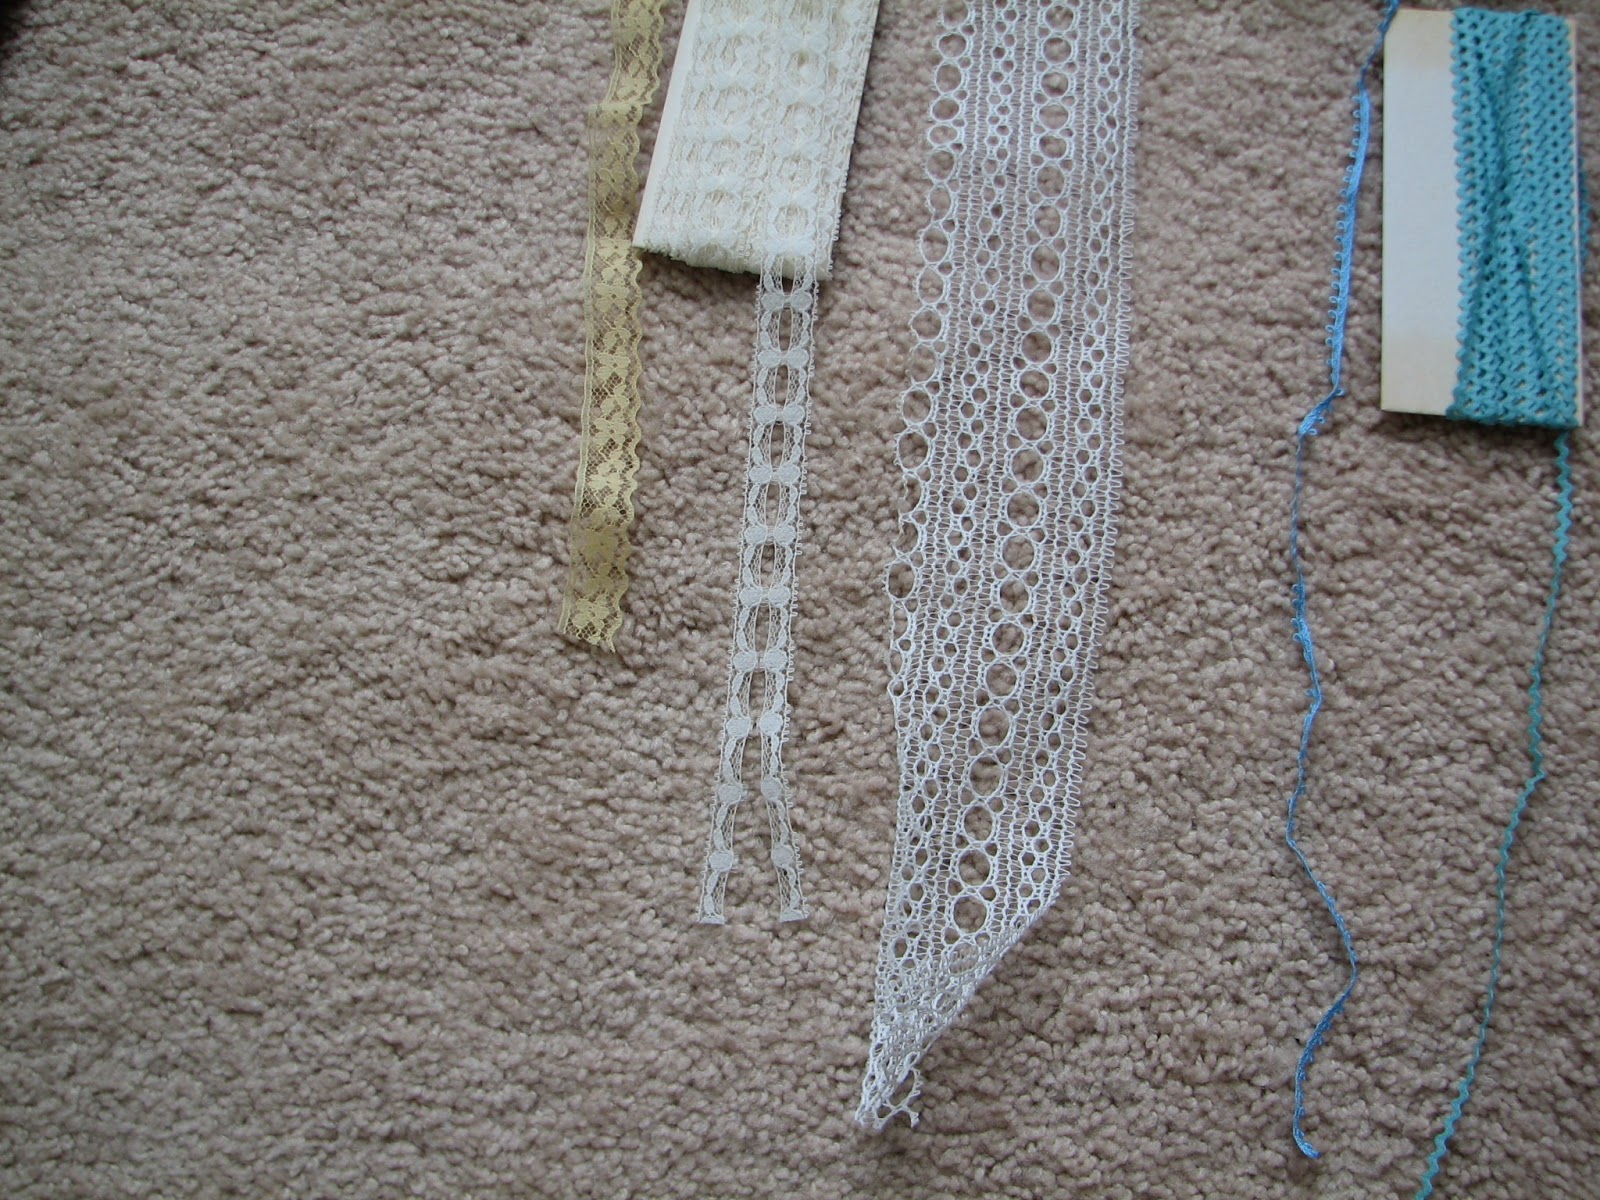
I like to use interesting trims on my buildings to give the feeling of architectural features and windows. Trims that I use can be laces, rick rack, piping, buttons, you name it! To the left you see some that I have in my stash that I considered for this quilt.
I am not really into the highly feminine girly look, so I have to be careful how I use lace on my pieces. For that reason I don't use lace that is ruffly. I am also careful about not using too much lace, and only using it in a setting that doesn't scream "girly". Since these are buildings, I think the lace as a surface embellishment is an interesting combination of hard and soft. It doesn't seem overly feminine to me.
You can see that one of the lace trims is separated down the middle For this quilt I slit this lace into 2 pieces so it fit on some of my narrower buildings more easily.
The rick rack is used to add a bit of whimsy, and that seems to fit since it is a summer-time looking piece.
Next entry - shading and changing trim colors.
Thanks for visiting my blog!
Subscribe to:
Posts (Atom)