Saturday, April 20, 2013

Transects In Time

This art quilt was previously referred to as "Lithologic Landscape" and has now been renamed "Transects In Time". I am glad to report that it is finished and delivered to it's new owner. It will hang in the Regional Water Quality Control Board office in San Luis Obispo.

The Regional Water Quality Control Board is charged with protecting the waters of the State of California and this art quilt shows the breadth of their responsibility. It depicts common human activities, some of which have the potential to impact the subsurface soils or groundwater, or surface waters such as lakes.  Surface activities include commercial businesses (diners, dry cleaners, shoe store, sporting goods, bakery, gas station, etc.), recreational lake usage, oil storage, farming, and residential use. A cross-section of the subsurface is also shown. In this depiction, one of the oil storage tanks has a leak that has impacted the subsurface.  A groundwater well has been installed to monitor this leak. One commercial business, a dry cleaner, also has a release to the subsurface.

Different fabrics have been assigned to represent various soil types including sand, silty-sand, silt, clay and bedrock. The leaks are made with beading on the fabrics. The oil leak uses yellow-orange beads and the dry cleaner leak uses red-orange beads. The shape of the beading is intended to be similar to how the chemicals would travel through the subsurface.

oil spill leak and well


dry cleaner leak


A variety of fibers are used to represent different subsurface lithologic layers, including velvets, cottons and metallic/poly blends. Surface features are made primarily with cotton fabric, with tulle overlay in some areas. Embroidery and beading are used through-out to add details.  The landscape has been mounted on black quilted fabric. The overall size is approximately 28" x 48". It was a fun challenge and its very satisfying to have it done.


Thanks for visiting my blog!

Saturday, April 13, 2013

A Budding Artist

This is artwork my niece Megan made for me. She loves making artwork and plans to be an artist when she grows up. I'm planning to start collecting her work now.

I love the incorporation of texting symbols in a 3-D fashion, as well as her use of vibrant colors. Keep your eye on this girl, she's got talent!

Wednesday, April 3, 2013

Mellow Yellow is Done!

Mellow Yellow
My delphinium piece is finished and here it is. I am calling it "Mellow Yellow". It is one of eight pieces in a traveling exhibit called "Delphinium Field" created by Artistic Expressions, an art group I am a member of. This exhibit will travel to all of the Mancuso quilt show and events this next year. I have a link to the Artistic Expressions blog on this page. If you click on it you can get the travel schedule for the exhibit and see the entire collection of delphinium themed fiber art pieces.

Thanks for visiting my blog!

Thursday, March 28, 2013

Delphinium - Machine Quilting

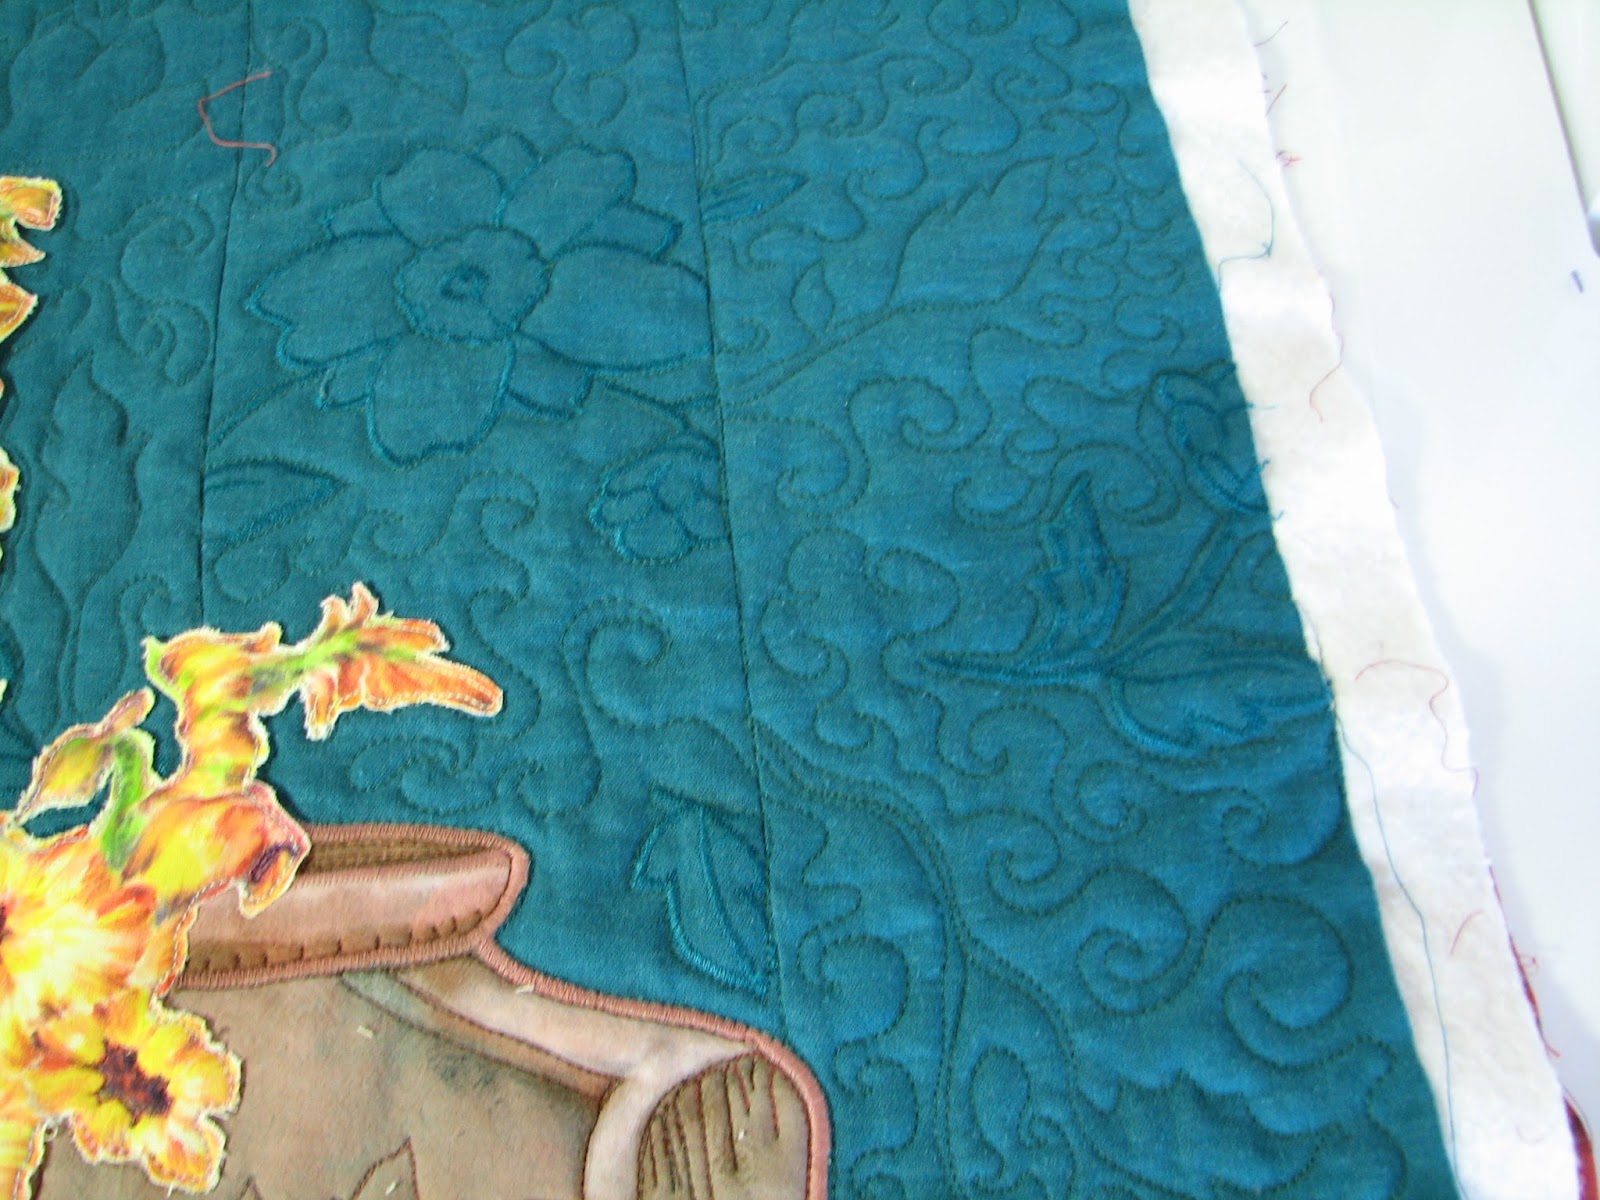
background quilting
 I have sandwiched the Delphinium quilt and have been doing the machine quilting stitching on it. On the background I chose to stitch around the embroidered flowers that were on the background and then stitch curling shapes and leaves in the other background areas.


pitcher and foreground stitching


On the foreground fabric I stitched around the ribbon appliques that were on the fabric. The pots were stitched to emphasize some of the 3 dimensional appearance or just to add something interesting to look at when you got close up to the piece.


flower centers stitched down


In the flower areas I stitched in just the flower centers with a thread that matched the color of the centers. I wanted to allow the petal area to puff out a bit so I did no stitching on the petals.

In this photo you can see the large flower area has stitching in the centers, but I have not stitched the flowers in the lower right yet. I think it makes a big difference in the appearance.


Thanks for visiting my blog and have a nice day! 

Saturday, March 23, 2013

Delphinium - Trapunto'd Flowers

satin stitched edges
 I am getting the Delphinium top ready for machine quilting now. The pieces are fused to the background, but I always stitch pieces down because fusing is just a temporary hold in my experience. The first thing I do is satin stitch around the pots and pitchers. To the left you can see this in the works.


trapunto step 1
I want to have the flowers be a bit more prominent than the rest of the top, so I am going to add a second layer of batting behind the flowers. I call this trapunto, but it is not "true trapunto".  True trapunto involves threading yarn through three layers of quilting, and is done by hand. This method is faster and much easier!

To get the trapunto effect I lay a piece of batting on the top back, over the area where the flowers are located. I am using a wool batting piece for this because it is puffier than the batting I will use for the entire piece.

The next step is to stitch from the front around the flower shapes, very close to the edge of the flower shapes. This photo shows the stitching around one of the flower shapes.


trapunto step 2
After stitching around the flower areas, you need to trim the batting very close to the stitching line. Here you see the back of the top with the trapunto batting layer trimmed. After the trimming is done then you sandwich the top with a layer of batting and the back just like you would any other quilt.

The photo below shows the puffier appearance of the flower area with the batting behind it. Now I'm onto the machine quilting phase!


trapunto puffy appearance


Thanks for visiting my blog!


Tuesday, March 19, 2013

I added a new option on my blog

Hi and thanks for stopping by. I recently added the "Followers - Join this Site" device to my blog. Previously I had just the option to follow by email.  If you like my blog please consider signing up as a follower. Thanks!

Eileen

Sunday, March 17, 2013

Delphiniums - Putting the Top Together

Raw silk foreground
Its a good feeling when you have the top figured out and get to the stage where you are now stitching pieces down. In my mind I tell myself I am now "on the machine" when I am at this point in a project. It is usually down hill from here, emphasis on "usually".

I often use the machine applique stitching as part of the machine quilting stitching, but in this case I am going to satin stitch around the pots to give them a smoother edge before I sandwich the quilt. I am going to do this because satin stitching through all the quilt layers sometimes is a bit cumbersome and doesn't always give me a clean look.

Sheer foreground fabric
Above you see a photo with the various parts of this art quilt layed against the background and a piece of beige raw silk that I am going to use as table top. I love the rough look of this raw sik, but was concerned about too much white going off the bottom of the page, so to speak.

I had a sheer gauzy companion fabric to the sari background fabric that I used and decided to lay it in the foreground. I love the way it adds a bit of the same blue green elsewhere in the piece. This fabric is the source of my curlicues too, so it all seems to work well together. At least to my eye! Now for the stitching down process!