Thursday, March 28, 2013

Delphinium - Machine Quilting

background quilting
 I have sandwiched the Delphinium quilt and have been doing the machine quilting stitching on it. On the background I chose to stitch around the embroidered flowers that were on the background and then stitch curling shapes and leaves in the other background areas.


pitcher and foreground stitching


On the foreground fabric I stitched around the ribbon appliques that were on the fabric. The pots were stitched to emphasize some of the 3 dimensional appearance or just to add something interesting to look at when you got close up to the piece.


flower centers stitched down


In the flower areas I stitched in just the flower centers with a thread that matched the color of the centers. I wanted to allow the petal area to puff out a bit so I did no stitching on the petals.

In this photo you can see the large flower area has stitching in the centers, but I have not stitched the flowers in the lower right yet. I think it makes a big difference in the appearance.


Thanks for visiting my blog and have a nice day! 

Saturday, March 23, 2013

Delphinium - Trapunto'd Flowers

satin stitched edges
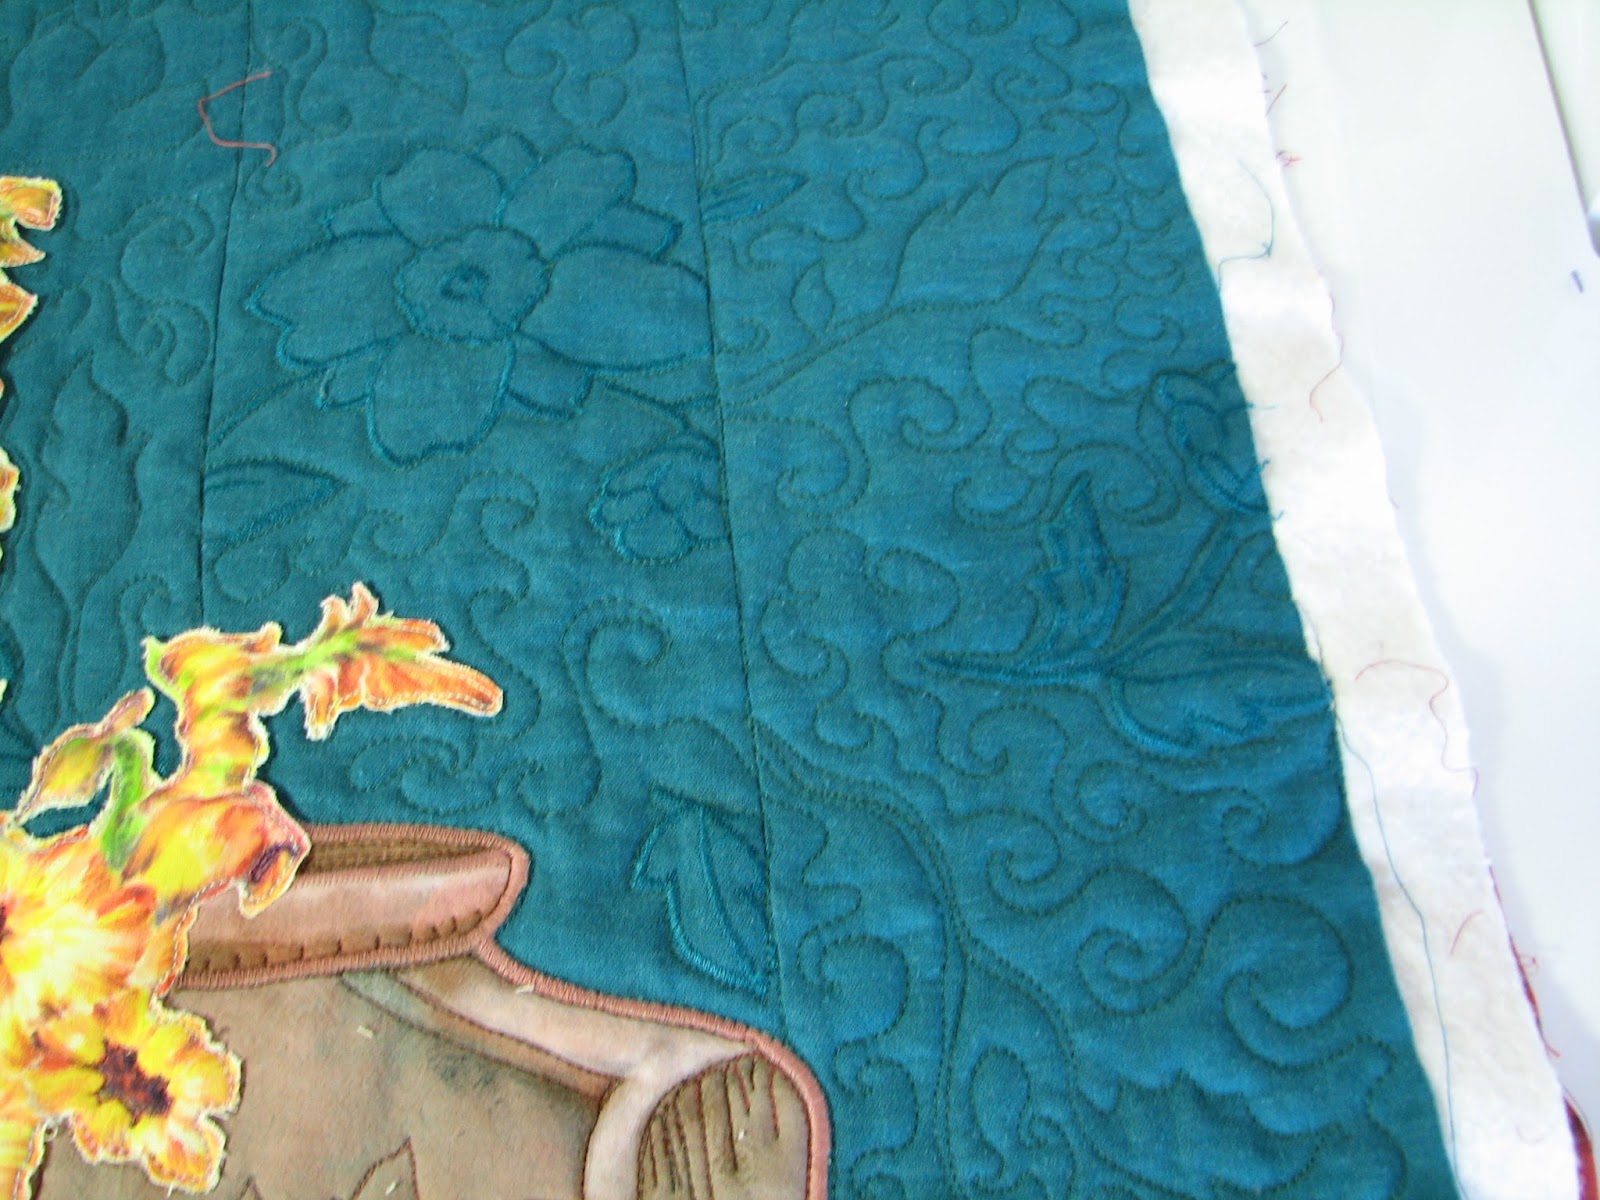
 I am getting the Delphinium top ready for machine quilting now. The pieces are fused to the background, but I always stitch pieces down because fusing is just a temporary hold in my experience. The first thing I do is satin stitch around the pots and pitchers. To the left you can see this in the works.


trapunto step 1
I want to have the flowers be a bit more prominent than the rest of the top, so I am going to add a second layer of batting behind the flowers. I call this trapunto, but it is not "true trapunto".  True trapunto involves threading yarn through three layers of quilting, and is done by hand. This method is faster and much easier!

To get the trapunto effect I lay a piece of batting on the top back, over the area where the flowers are located. I am using a wool batting piece for this because it is puffier than the batting I will use for the entire piece.

The next step is to stitch from the front around the flower shapes, very close to the edge of the flower shapes. This photo shows the stitching around one of the flower shapes.


trapunto step 2
After stitching around the flower areas, you need to trim the batting very close to the stitching line. Here you see the back of the top with the trapunto batting layer trimmed. After the trimming is done then you sandwich the top with a layer of batting and the back just like you would any other quilt.

The photo below shows the puffier appearance of the flower area with the batting behind it. Now I'm onto the machine quilting phase!


trapunto puffy appearance


Thanks for visiting my blog!


Tuesday, March 19, 2013

I added a new option on my blog

Hi and thanks for stopping by. I recently added the "Followers - Join this Site" device to my blog. Previously I had just the option to follow by email.  If you like my blog please consider signing up as a follower. Thanks!

Eileen

Sunday, March 17, 2013

Delphiniums - Putting the Top Together

Raw silk foreground
Its a good feeling when you have the top figured out and get to the stage where you are now stitching pieces down. In my mind I tell myself I am now "on the machine" when I am at this point in a project. It is usually down hill from here, emphasis on "usually".

I often use the machine applique stitching as part of the machine quilting stitching, but in this case I am going to satin stitch around the pots to give them a smoother edge before I sandwich the quilt. I am going to do this because satin stitching through all the quilt layers sometimes is a bit cumbersome and doesn't always give me a clean look.

Sheer foreground fabric
Above you see a photo with the various parts of this art quilt layed against the background and a piece of beige raw silk that I am going to use as table top. I love the rough look of this raw sik, but was concerned about too much white going off the bottom of the page, so to speak.

I had a sheer gauzy companion fabric to the sari background fabric that I used and decided to lay it in the foreground. I love the way it adds a bit of the same blue green elsewhere in the piece. This fabric is the source of my curlicues too, so it all seems to work well together. At least to my eye! Now for the stitching down process!

Sunday, March 10, 2013

Sequins Here, Sequins There, Sequins Everywhere!

For the background fabric for my delphinium piece I was planning on using a dark ultramarine blue, but I found a blue-green fabric in my stash that had some floral embroidered shapes on it with sequins. I loved the way this fabric color made the flowers and pots "pop", and wanted to use it. It is a fabric that I purchased years ago because I thought it looked so cool. I think it is intended for use in making saris, but I am not sure. These two photos show the fabric and you can see the embroidered floral shapes and sequins.

I thought the sequins on this fabric would make for an added level of interest in this quilt. However, when I placed the flowers and pots against this fabric and held it up to a mirror to look at it, all I saw was the reflection from the sequins. It was a very distracting element.  I also asked some of my art quilting friends and they agreed that it drew the eye away from everything else in the piece. I either had to remove the sequins or find another background fabric. Here you can see how the sequins show on the background. It is just too much light reflection for an area that is supposed to be "background".


Well I could never find a fabric with the same shade of blue green and decided I needed to use this fabric from my stash. That means removing the sequins, which didn't seem that difficult since it was just a single stitch to remove from the back of the fabric, right? Wrong! They were stitched on with some strange industrial sewing machine stitch that went around the sequin a couple of different ways. I used my seam ripper to attack this stitching from all angles, and finally the sequins started coming off...and off... and off!  I did my best to control these popping sequins, but they have a mysterious way of sticking to everything they come close to and I had sequins all over the place. I vacuumed, swept and hand picked them up, but sequins are still showing up from I don't know where! 


Nevertheless I persevered and finished the sequin removal operation. I cut the background fabric up in slices and restitched it to distribute the embroidered areas around in a more pleasing manner. It was a bit of work but I was happy with the end product after it was all said and done. The last photo shows the background, sans sequins, cut up and re-sewn.

Sunday, March 3, 2013

Delphinium Pots

pots
I'm still busy working on my Delphinium piece. To the right you see a close up of the pots. I chose three different brown/sienna colored fabrics to make the five pots/pitchers.

Three of the fabrics were painted before the pot shapes were cut out to give them a little variation in appearance.  I used setacolor paints for this mixed with a little bit of aloe vera gel.

After the pot shapes were cut out I used paints to add some shading and highlights so they had some three dimensionality. I thought I needed to do this since the flowers have a more realistic appearance.
pitcher
I have placed the cut-out of the flowers on the pots to get a feel for the appearance, and added a little  blue green curlicue that I am going to add to the piece at the end.

Here is a close up of the pitcher showing the painting I have done on the lip, handle and side for highlights, and the darker paint I used inside the lip.