| Hisbiscus |
Sunday, June 26, 2011
Hibiscus - Postcard Quilt
This is my postcard quilt for my Serendipity Exchange. The theme this time is "Flower". I painted a hibiscus from a photo I took while on a cruise in the South Pacific a few years ago. I used Tsukineko ink paints. I practiced some new leaf machine quilting patterns I recently learned from Cynthia Catlin in the background. For the border I couched some yarn around the edge. This is being sent to Linda Friedman as we speak. I hope she likes it.
Sunday, June 19, 2011
Umpqua Leaves Construction Detail
I thought it might be helpful to see how this applique technique works. After cutting out the leaf shapes and placing them on your square, you place a layer of batting behind the square and stitch the leaves down. You stitch on the leaf itself near its edge and then in the middle of the leaf. The leaves are raw edge and the batting piece is approximately the same size as the square.
Then you turn the block over and trim the batting away around the leaf. You try to trim as close to the stitching as possible. Once all your blocks are done you stitch them together to make the top.
The top is then layered with batting and the back, and quilted in the background around the leaves. This effect "pops" the leaves out.
I learned this in a class taught by Jill Howes at Flying Geese Fabric. I have used it to make other applique motifs pop out on other quilts.
| trapunto effect |
| trapunto effect |
The top is then layered with batting and the back, and quilted in the background around the leaves. This effect "pops" the leaves out.
I learned this in a class taught by Jill Howes at Flying Geese Fabric. I have used it to make other applique motifs pop out on other quilts.
Wednesday, June 15, 2011
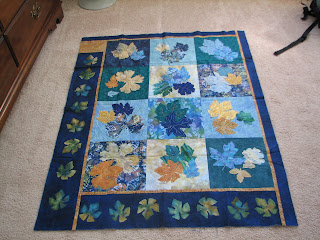
Umpqua Leaves with Border
 |
| borders attached |
Sunday, June 5, 2011
Border for Umpqua Leaves
 |
| oil paint stick border |
I really enjoy using the paint sticks. The only down side is you have to wait a few weeks for the odor to completely dissipate. The paint itself is dry after about 3 days and can be heat set then. So this technique is not good for the "last minute"!
Wednesday, June 1, 2011
Umpqua Leaves
A couple of years ago I took a class from Jill Howes to learn the technique she used to make a quilt she calls "Sonoma Leaves". It is a stunning quilt and the leaves have a raised effect. I decided to make my own version of this from leaves I collected at the North Umpqua River in Oregon. This is the center of the quilt. Next step will be putting on borders. I hope to get that done this weekend.
Subscribe to:
Posts (Atom)
